반응형


아직 포스팅할 내용들이 많지만..

db 연결 방법이 궁금해서 아주 간단한 mysql 연결 shell script 를 찾았습니다.


음.. 일단 mysql 서비스가 실행 한다는 가정하에.. dbtest.sh 라는 파일을 만듭니다.


vim dbtest.sh

 + dbtest.sh                                                                      

  1 #!/bin/bash

  2 mysql -u root redCat<<EOFMYSQL

  3 select * from MenuItem;

  4 EOFMYSQL


스크립트를 작성 후, 내용을 저장 한 뒤 권한을 바꿔줍니다. 

좀더 편리하게 만들 예정입니다만, 일단 가장 간단한 스크립드를 먼저 공유합니다.


chmod 700 dbtest.sh


제 맥에서 돌고 있는 mysql 서비스엔 redCat 이라는 데이터베이스가 있습니다. redCat 데이터 베이스 안에 있는 MenuItem 테이블의 내용을 모두 성공적으로 화면에 보여주었네요.


이상입니다. 

반응형
반응형


Vim 사용하시는 분들은 아마도 여러 세팅을 하여 config 을 저장할 수 있도록 한 뒤 사용중이라고 하네요. 이번에 간단하게 줄 번호 보여주는 세팅 과 인덴트 를 자동으로 해주는 세팅을 만들어봤습니다.


기본적으로 .vimrc 파일이 없어서 저는 만들어야 했습니다. 만들기 전에 확인 필수 입니다.


vim .vimrc


이렇게 만들고 나면 vim 실행하니 제 화면이 아래와 같이 변하였습니다.

그외에 더 많은 세팅을 원하시면 다음 링크가 유명한 Ultimate VIM configuration 입니다.


여하튼 vim 세팅은 이정도로 하고, 쉘 스크립트의 if-else 예문을 소개합니다.

shell script 의 if-else 는 간단합니다. 주의해야 할 점은 비교 변수와 "[" 그리고 시작의 "if" 사이에 모두 공백이 필요합니다.


간단하게 echo 로 이름을 묻고, name 변수에 read 해줍니다. 같은 방법으로 나이를 물은 뒤 age 변수에 read 하지요.


if 문의 기본 문법은 if [ 변수 test 대상 ] then 실행문 else 실행문 fi

이렇게 됩니다. if 로 시작하여 if 의 반대인 fi 로 끝을 내 줍니다. 비교 test 는 -lt (less than 보다 작다) 를 사용했는데요, 그외 다른 어떤 비교 test 들이 있는지는 확인 가능합니다.


여기서는 간단하게 18 세 이상이면 맥주를.. 이하면 안된다.. 라고 간단하게 출력합니다.


man test

혹은

man [


메뉴얼 내에 많은 내용이 있는데요 그중 몇개만 추려봤습니다.


       STRING1 = STRING2
              the strings are equal

       STRING1 != STRING2
              the strings are not equal

       INTEGER1 -eq INTEGER2
              INTEGER1 is equal to INTEGER2

       INTEGER1 -ge INTEGER2
              INTEGER1 is greater than or equal to INTEGER2

       INTEGER1 -gt INTEGER2
              INTEGER1 is greater than INTEGER2

       INTEGER1 -le INTEGER2
              INTEGER1 is less than or equal to INTEGER2

       INTEGER1 -lt INTEGER2
              INTEGER1 is less than INTEGER2

       INTEGER1 -ne INTEGER2
              INTEGER1 is not equal to INTEGER2


자.. 이렇게 만들어진 스크립트 테스트를 하면 결과는 다음과 같습니다.

항상 실행 전에 파일 접근 권한을 700 으로 사용자에게 읽기 쓰기 실행 권한을 부여합니다.


간단한 쉘 스크립트 내 if-else 사용법을 알아봤습니다. 


다음은 if-elif-else 예문입니다. 최간단 계산기.


1) 2개 의 argument 를 받습니다.

2) 계산법을 받습니다.

3) 계산을 출력합니다.


vim calc.sh


받을 argument 들은 $1, $2 로 받습니다.

$(($1+$2)) 로 계산 합니다.


결과입니다. 실행 시, argument 를 2개 넣어줍니다. 예에서는 8 과 9 로 실행하였습니다.

반응형
반응형

Shell Script 의 기본


bash-4.1$ x=3
bash-4.1$ echo $x
3


bash-4.1$ echo "hello     there"
hello     there

bash-4.1$ echo 'hello     there'
hello     there
bash-4.1$ echo hello      there
hello there


bash-4.1$ echo "the value of x:     $x"
the value of x:     3
bash-4.1$ echo 'the value of x:     $x'
the value of x:     $x
bash-4.1$ echo 'I have $10000'
I have $10000


bash-4.1$ echo Today is `date`
Today is Wed Aug 6 12:50:46 EST 2014
bash-4.1$ echo "Today is `date`"
Today is Wed Aug  6 12:51:00 EST 2014


permission

bash-4.1$ ls -l
total 2
-rw-r--r--+ 1 11776352 Students   0 Jul 30 13:06 a.txt
-rw-r--r--+ 1 11776352 Students   0 Jul 30 13:06 c.txt
-rw-r--r--+ 1 11776352 Students 334 Aug  6 12:40 hello.txt

bash-4.1$ chmod 600 a.txt
bash-4.1$ ls -l
total 2
-rw-------+ 1 11776352 Students   0 Jul 30 13:06 a.txt
-rw-r--r--+ 1 11776352 Students   0 Jul 30 13:06 c.txt
-rw-r--r--+ 1 11776352 Students 334 Aug  6 12:40 hello.txt

bash-4.1$ chmod 644 a.txt
bash-4.1$ ls -l
total 2
-rw-r--r--+ 1 11776352 Students   0 Jul 30 13:06 a.txt
-rw-r--r--+ 1 11776352 Students   0 Jul 30 13:06 c.txt
-rw-r--r--+ 1 11776352 Students 334 Aug  6 12:40 hello.txt

first --- user (u)
second --- group (g)
third --- other (o)

0 000
1 001 * execute = 1
2 010 * write = 2
3 011
4 100 * read = 4
5 101
6 110
7 111

readable, writable, executable = 4+2+1 = 7 (rwx)

chmod 755 myfile
chmog o+x myfile
chmog o-x myfile


Script 실행


bash-4.1$ hello.sh
bash: hello.sh: command not found
bash-4.1$ pwd
/home/11776352/usp/2
bash-4.1$ /home/11776352/usp/2/hello.sh
hello world
bash-4.1$ cd ..
bash-4.1$ 2/hello.sh
hello world
bash-4.1$ cd 2/
bash-4.1$ ls
a.txt  c.txt  hello.sh    hello.txt
bash-4.1$ ../2/hello.sh
hello world
bash-4.1$ ./hello.sh
hello world


 Script 응용


반응형
반응형


vi - 엔하위키 미러 링크 합니다. vim 이 무엇인지 궁금하신 분들이나 역사 등을 원하시면 읽어보시면 좋습니다.


일단 초보자들이 vi를 처음 보고 가장 당황하는 것은 실행을 시켰는데 키보드가 먹히질 않는다는 점이다. 당황해서 막 누르다보면 또 어느 순간 입력이 되기 시작한 다. vi에는 일반 모드, 입력 모드, 명령 모드의 세 가지 모드가 존재하기 때문인데, 그걸 모르고 초심자가 vi로 뭔가 하려고 손댔다가 입력은 안 되지, 삭제도 안 되지, 갑자기 모드가 바뀌어서 입력이 되지, esc 눌러도 종료는 안 되지... 하는 상황 때문에 봉변을 당하는 경우가 많다. -- vi - 엔하위키 내용 중에서


vim editor..
/vim hello.txt

F11- full screen


vim 에디터는 대기모드, 입력모드, 명령어 모드 총 3가지 모드가 있습니다. 대기 모드는 말 그대로 대기모드이며, 대기모드에서 명령어 키 들을 입력하여 줄을 지운다던지, 단어를 지우거나, 입력모드 혹은 명령어 모드로 들어갑니다.


입력모드 활성화는 영문 키 i 를 눌러 시작합니다.

대기모드는 어떤 모드에서든지 esc 키를 눌러 활성화 시킵니다.

명령어 모드는 : 를 누른 뒤 원하는 명령어를 입력합니다.


i - input string (입력모드)
o - open a new line
a - append string
esc - normal mode (대기모드)

. - repeat previous command
u - undo

j - move down
k - move up
l - move right
h - move left
w - move to the next words
b - move back to the previous words

dd - deletes a whole line
5d - deletes 5 lines
p - put deleted lines.
yy - copy a whole line

dw - deletes a word
/ - activates command line
/current - searchs word "current"
shift -g : end of the file


: (명령어 모드)
:w - write a file
:q - to quit
:q!-  to quit without saving
:wq - to write and quit
:x - to write and quit
:qa - to quit all

멀티태스킹 ㅡ,.ㅡ;
ctrl-z - stopps the vim
jobs -  shows running application
fg - back to vim


반응형
반응형


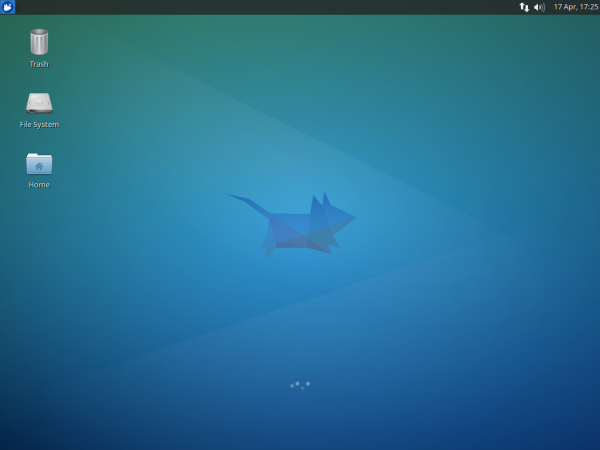
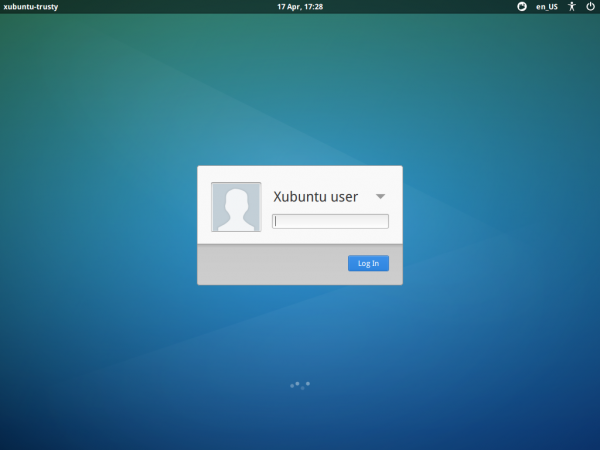
제 기가바이트 넷북에 설치한 ubuntu 14.04 는 우분투 내 발전된 사용자 인터페이스로 인해 넷북에 설치된 비디오카드와 메모리 용량으로 소화하기 힘든 상태였습니다. 여러가지 설정을 바꿔가며 에니메이션도 줄이고, 비침효과도 없애보고 해보았지만 워낙 오래된 기가바이트 넷북이여서 그런지 여전히 버벅되더군요. 그래서 결정한게 Xubuntu 의 설치입니다. 아래 스크린샷 처럼 간단하면서 클래식한 인터페이스.. 참 좋아 보였습니다.

우분투 터미널에서 바로 설치하는 명령어 입니다.

1. Xubuntu install

sudo apt-get install xubuntu-desktop gksu leafpad synaptic


다운 받은 뒤 설치가 끝나면 바로 재시작을 하여 Xubuntu 로 들어갑니다. Xubuntu 데스크탑에서 좌상단 파란색 버튼 -> 악세사리 -> 터미널 에뮬레이터 를 실행하여 아래 명령어를 실행해 줍니다. 여러가지 쓸데 없는 내용들을 삭제 해주며 특히 unity 부분을 삭제 하는게 맘에 드네요 ㅋㅋ


2. clean up

sudo apt-get remove nautilus gnome-power-manager gnome-screensaver gnome-termina* gnome-pane* gnome-applet* gnome-bluetooth gnome-desktop* gnome-sessio* gnome-user* gnome-shell-common compiz compiz* unity unity* hud zeitgeist zeitgeist* python-zeitgeist libzeitgeist* activity-log-manager-common gnome-control-center gnome-screenshot overlay-scrollba* && sudo apt-get install xubuntu-community-wallpapers && sudo apt-get autoremove


이렇게 ubuntu 14.04 에서 Xubuntu 14.04 로 탈바꿈 되었습니다.

정말 가버워진 느낌이며 한정된 리소스의 사용이 잘 활용되는 느낌입니다.

원하는 작업을 하는데 속도 저하는 없네요. 인터넷 브라우징 과 구글독스 에서 문서 작업이 느리지 않아 무척 좋습니다.

반응형
반응형


유닉스 혹은 리눅스 기본 명령어 모음입니다. 모두 기본적인 파일 구조 명령어 들이라서 디렉토리(폴더) 만들어서 디렉토리 간 파일 이동, 삭제 등을 다룹니다.


유닉스나 리눅스에서는 프롬프트가 따로 친절히 경로를 표시해 주지 않아 마지막 부분에 프롬프트 변경 방식도 다뤄볼 예정입니다.


unix_tutorial_01.txt 파일의 내용은 아래와 같습니다.

Name: Ryan Heise
Email: ryan@ryanheise.com


터미널에서 명령어 연습을 한 로그를 모두 긁어 모은 형태 이므로 블록 글자들이 명령어고 바로 아래 내용들이 결과물입니다.


bash-4.1$ date
Wed Jul 30 12:25:57 EST 2014

bash-4.1$ echo hello
hello

bash-4.1$ cat /home/yobine/semester\ 2/Unix_tutorial/unix_tutorial_01.txt
Name: Ryan Heise
Email: rian@riunheise.com

bash-4.1$ cat /home/yobine/semester\ 2/Unix_tutorial/unix_tutorial_01.txt /home/yobine/semester\ 2/Unix_tutorial/unix_tutorial_01.txt
Name: Rian Heise
Email: rian@riunheise.com

Name: Rian Heise
Email: rian@riunheise.com

bash-4.1$ cd /home/yobine/semester\ 2/Unix_tutorial/
bash-4.1$ ls
unix_tutorial_01.txt

bash-4.1$ pwd
/home/yobine/semester 2/Unix_tutorial
bash-4.1$ cd
bash-4.1$ pwd
/home/yobine
bash-4.1$ cd ..
bash-4.1$ ls
yobine
bash-4.1$ pwd
/home
bash-4.1$ cd /
bash-4.1$ pwd
/

bash-4.1$ ls
bin   cgroup  etc   images  lib64    media  mnt  opt   pub    sbin     srv  tmp  var
boot  dev     home  lib     lost+found    misc   net  proc  root    selinux  sys  usr

bash-4.1$ whoami
yobine


bash-4.1$ cd /home/Heise
bash-4.1$ ls
ls: cannot open directory .: Permission denied

bash-4.1$ pwd
/home/Heise


bash-4.1$ cd /
bash-4.1$ ls
bin   cgroup  etc   images  lib64    media  mnt  opt   pub    sbin     srv  tmp  var
boot  dev     home  lib     lost+found    misc   net  proc  root    selinux  sys  usr
bash-4.1$ pwd
/
bash-4.1$ cd
bash-4.1$ pwd
/home/yobine
bash-4.1$ cd semester\ 2/Unix_tutorial/
bash-4.1$ ls
a.txt  b.txt  unix_tutorial_01.txt  unix_tutorial_01.txt~

bash-4.1$ groups
Students

bash-4.1$ ls -l
total 5
-rw-r--r--+ 1 yobine Students  44 Jul 30 12:13 a.txt
-rw-r--r--+ 1 yobine Students  44 Jul 30 12:13 b.txt
-rw-r--r--+ 1 yobine Students 918 Jul 30 12:40 unix_tutorial_01.txt
-rw-r--r--+ 1 yobine Students  44 Jul 30 12:13 unix_tutorial_01.txt~


bash-4.1$ ls -l /
total 108
dr-xr-xr-x.   2 root root  4096 Jun 23 12:39 bin
dr-xr-xr-x.   4 root root  4096 Feb 12 06:24 boot
drwxr-xr-x    2 root root  4096 Dec  3  2013 cgroup
drwxr-xr-x   19 root root  3860 Jul 30 10:17 dev
drwxr-xr-x. 131 root root 12288 Jul 30 12:41 etc
drwxr-xr-x    4 root root     0 Jul 30 12:41 home
drwxr-xr-x.  15 root root  4096 Jul 30 12:01 images
dr-xr-xr-x.  13 root root  4096 Jun 23 12:38 lib
dr-xr-xr-x.  10 root root 12288 Jun 23 12:38 lib64
drwx------.   2 root root 16384 Feb  6  2013 lost+found
drwxr-xr-x.   2 root root  4096 Jun  5 16:00 media
drwxr-xr-x    2 root root     0 Jul 30 10:17 misc
drwxr-xr-x.   2 root root  4096 Jun 29  2011 mnt
drwxr-xr-x    2 root root     0 Jul 30 10:17 net
drwxr-xr-x.  23 root root  4096 Jul 29 12:38 opt
dr-xr-xr-x  243 root root     0 Jul 30  2014 proc
drwxr-xr-x    2 root root     0 Jul 30 10:17 pub
drwx------.  10 root root  4096 Jul 16 12:06 root
dr-xr-xr-x.   2 root root 12288 Jun 23 12:38 sbin
drwxr-xr-x.   2 root root  4096 Feb  6  2013 selinux
drwxr-xr-x.   2 root root  4096 Jun 29  2011 srv
drwxr-xr-x   13 root root     0 Jul 30  2014 sys
drwxrwxrwt.  26 root root  4096 Jul 30 12:47 tmp
drwxr-xr-x.  16 root root  4096 Jul 22  2013 usr
drwxr-xr-x.  23 root root  4096 Jul 18 07:10 var

bash-4.1$ ls -l /home/yobine/semester\ 2/
total 2
drwxr-xr-x+ 2 yobine Students 6 Jul 30 12:45 Unix_tutorial

bash-4.1$ mkdir usp
bash-4.1$ ls
cnsql.sh  nasa2.sql~  newls.sh~   semester 2  usp       workspace
Desktop   new file~   semester 1  sql.sh~     vpworkspace

bash-4.1$ cd usp
bash-4.1$ ls
bash-4.1$ mkdir 1
bash-4.1$ mkdir 2 3 4 5 6 7
bash-4.1$ ls
1  2  3  4  5  6  7

bash-4.1$ pwd
/home/yobine/usp

bash-4.1$ cd 1
bash-4.1$ touch hello.txt
bash-4.1$ ls
hello.txt
bash-4.1$ touch a.txt b.txt c.txt

bash-4.1$ ls -l
total 2
-rw-r--r--+ 1 yobine Students 0 Jul 30 12:56 a.txt
-rw-r--r--+ 1 yobine Students 0 Jul 30 12:56 b.txt
-rw-r--r--+ 1 yobine Students 0 Jul 30 12:56 c.txt
-rw-r--r--+ 1 yobine Students 0 Jul 30 12:54 hello.txt

bash-4.1$ touch hello.txt //creates file but also changes the modification date (update dates)

bash-4.1$ ls -l
total 2
-rw-r--r--+ 1 yobine Students 0 Jul 30 12:56 a.txt
-rw-r--r--+ 1 yobine Students 0 Jul 30 12:56 b.txt
-rw-r--r--+ 1 yobine Students 0 Jul 30 12:56 c.txt
-rw-r--r--+ 1 yobine Students 0 Jul 30 12:56 hello.txt

bash-4.1$ cp a.txt mycopy.txt
bash-4.1$ ls -l
total 3
-rw-r--r--+ 1 yobine Students 0 Jul 30 12:56 a.txt
-rw-r--r--+ 1 yobine Students 0 Jul 30 12:56 b.txt
-rw-r--r--+ 1 yobine Students 0 Jul 30 12:56 c.txt
-rw-r--r--+ 1 yobine Students 0 Jul 30 12:56 hello.txt
-rw-r--r--+ 1 yobine Students 0 Jul 30 12:59 mycopy.txt

//move files to other directories, but in the same directory, it changes the name of the file.
bash-4.1$ mv b.txt newname.txt
bash-4.1$ ls -l
total 3
-rw-r--r--+ 1 yobine Students 0 Jul 30 12:56 a.txt
-rw-r--r--+ 1 yobine Students 0 Jul 30 12:56 c.txt
-rw-r--r--+ 1 yobine Students 0 Jul 30 12:56 hello.txt
-rw-r--r--+ 1 yobine Students 0 Jul 30 12:59 mycopy.txt
-rw-r--r--+ 1 yobine Students 0 Jul 30 12:56 newname.txt

bash-4.1$ mv newname.txt /home/yobine/newname.txt
bash-4.1$ mv newname.txt ../../newname.txt

bash-4.1$ cd ..
bash-4.1$ pwd
/home/yobine/usp


bash-4.1$ cd 1/../2/../../usp/1
bash-4.1$ pwd
/home/yobine/usp/1
bash-4.1$ ls
a.txt  c.txt  hello.txt  mycopy.txt  newname.txt

bash-4.1$ cp a.txt c.txt ../2
bash-4.1$ ls
a.txt  c.txt  hello.txt  mycopy.txt  newname.txt

bash-4.1$ ls ../2
a.txt  c.txt

bash-4.1$ cd ../2
bash-4.1$ pwd
/home/yobine/usp/2
bash-4.1$ ls
a.txt  c.txt

//to change the root prompt with a view,
//try man bash and search for PROMPTING (/PROMPTING)

반응형

+ Recent posts